
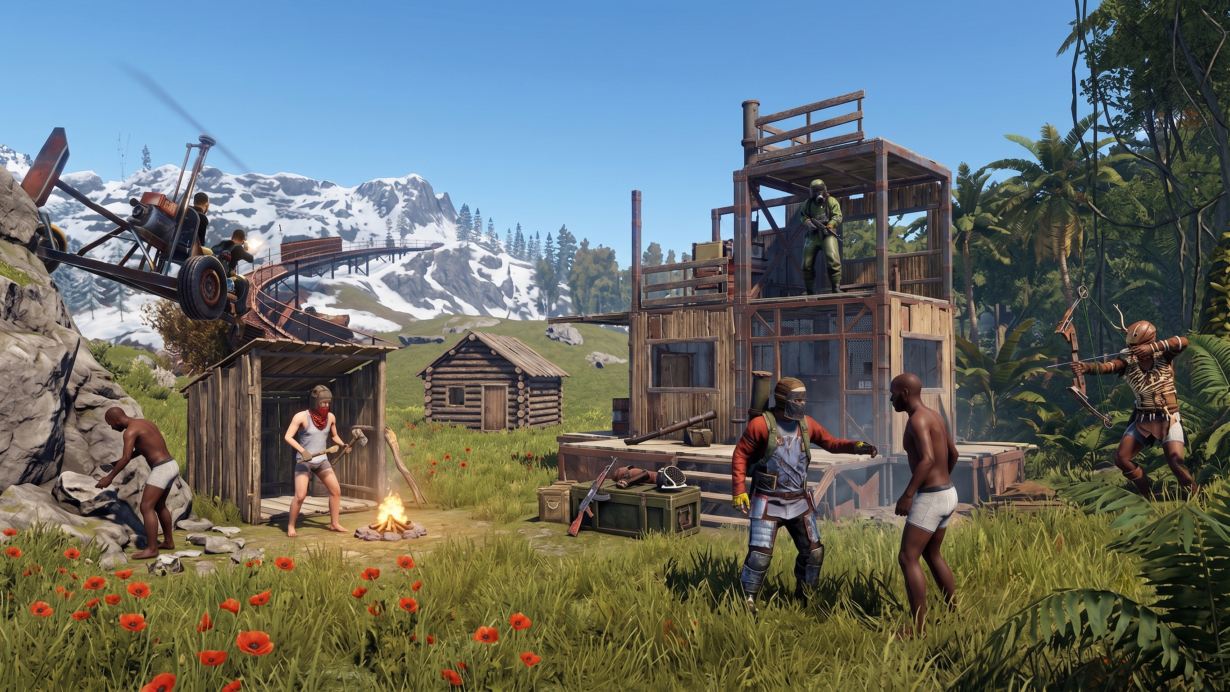

Rust is one of the most punishing survival games you will ever load into. You wake up on a beach with nothing but a rock and a torch, surrounded by players who already know every trick in the book. The good news: every single one of those experienced players started exactly where you are right now, and every wipe gives you a clean slate to try again.
This rust beginner guide breaks down what to do in your first hour, how to pick the right server, why the wipe cycle shapes everything, and how to build a base that actually survives the night. The advice here is practical and 2026-current, built around the mistakes that kill new players before they ever get to enjoy the game. If you play on platforms like Rewardly, you already know the gaming rewards world; this guide pairs that same gamer-first mindset with survival fundamentals that will keep you alive long enough to appreciate Rust’s depth.
Key Takeaways
- Your server choice and wipe timing matter more than your aim; joining a fresh wipe on a beginner-friendly community server gives you the fairest start possible.
- Prioritize a sleeping bag, basic tools, and a tiny upgraded base in your first hour instead of chasing fights or monuments.
- Smart loot hiding, airlock doors, and offline-raid awareness will protect your progress far more than stockpiling weapons you are not ready to use.
How Rust Works
Rust is a multiplayer survival game built by Facepunch Studios where gathering, building, and defending are woven into a single high-stakes loop. Every resource you collect feeds into crafting. You can access the crafting menu to see what items you can build with your current resources. Every structure you build becomes a target, and every player on the server is a potential threat or ally. Using voice chat can help you negotiate with neighbors or identify threats before they get too close.
The Core Survival Loop
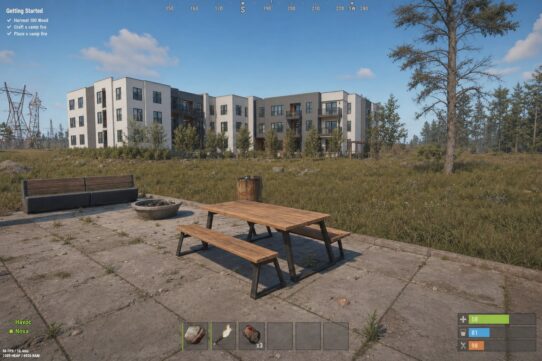
You spawn naked on a randomized beach. Your immediate job is to hit trees and rocks with your starting rock to collect wood, stone, and metal ore. Those raw materials let you craft tools, which speed up gathering, which lets you build a shelter, which protects the loot you need to craft better gear.
Food, water, and health layer on top. Hunger and thirst drain over time, so you need to hunt animals, pick up mushrooms, or farm crops. Radiation near monuments damages you without proper clothing, but wearing a hazmat suit allows you to safely loot the most irradiated areas. The entire loop feeds itself: better gear means faster farming, faster farming means a stronger base, and a stronger base means you survive long enough to push into higher-tier content like monument puzzles and keycards.
Why Every Decision Has Consequences
Rust does not pause. Your base exists on the server 24/7, even when you log off. Other players can raid it while you sleep. Every door you forget to lock, every wall you leave as twig, and every base you build too close to a high-traffic area is a decision that can cost you hours of progress.
Death means dropping your entire inventory on the ground. Anyone can pick it up. There is no “safe” inventory slot beyond what you store inside a locked base. This permanence is what makes Rust feel intense, but it is also what makes smart preparation so rewarding.
What Success Looks Like On Day One
Forget about raiding other players or running top-tier monuments on your first day. Success as a Rust beginner looks like this: you have a small, upgraded base with a tool cupboard, a sleeping bag inside so you respawn at home, a locked door with an airlock, and enough food and basic gear to start your second session without starting from zero.
That is the bar. Hit it, and everything else becomes a progression path rather than a panic spiral.
Pick The Right Server Before You Spawn

Your server choice shapes your entire experience more than any in-game skill. The wrong server can pit you against organized clans on day one, while the right one gives you breathing room to learn core mechanics without constant spawn-killing.
Official Vs Community Servers
Official servers are hosted by Facepunch and show up in the “Official” tab of the server browser. They tend to attract experienced players, run high populations (often 200+), and have minimal moderation beyond Facepunch’s anti-cheat. As a community discussion on Steam notes, many newcomers jump into a highly populated official server and get crushed repeatedly before learning anything useful.
Community servers are run by independent admins who set their own rules, population caps, and moderation standards. Many community servers enforce no-KOS (kill-on-sight) zones, require minimum group sizes, or actively ban cheaters faster than official servers do. For your first wipe, a community server with 50 to 100 players is a far better classroom.
Vanilla Vs Modded Servers
A vanilla server runs the default Rust experience with no gameplay alterations. Gather rates, crafting times, and loot tables are exactly as Facepunch designed them. This is the “true” Rust experience, but it is also the slowest, which can be frustrating when you are still figuring out the basics.
A modded server adjusts one or more game settings. Common modifications include 2x or 3x gather rates, increased stack sizes, faster crafting, and quality-of-life plugins like teleportation or kits. A lightly modded server (2x gather, for example) cuts the grind while keeping the core survival feel intact. Heavily modded servers (10x, battlefield, creative) are fun for practice, as are ukn servers for recoil training, but they will not teach you real Rust survival pacing.
For a first wipe, a 2x or 3x modded server is the sweet spot. You learn the mechanics without spending three hours farming stone for a single wall upgrade.
How To Find Beginner-Friendly Servers
Open the server browser and filter by the “Community” tab. Search keywords like “beginner,” “noob friendly,” “solo/duo,” or “trio” to find servers with group-size limits that prevent large clans from dominating. Check the server’s player count and aim for 50 to 100 active players.
Look at the server description for wipe schedule information, gather rate, and rules. A dedicated guide on beginner server selection recommends reading the server’s Discord or rules page before committing, since active admins who respond to reports make a massive difference in your experience.
Sort by “Last Wiped” to find servers that wiped recently. Joining a server three days into a weekly wipe means everyone else already has guns and metal bases while you are hitting trees with a rock.
Understand The Wipe Schedule

Rust’s wipe cycle is the heartbeat of the entire game. Every server periodically resets, deleting all bases, inventories, and sometimes blueprints, which means timing your start around wipes is one of the smartest things you can do as a new player.
What A Wipe Cycle Changes
When a server wipes, the map is regenerated and all player-built structures, stored items, and vehicles are deleted. Everyone starts fresh on the beach with the same rock and torch. Most servers also reset the map terrain, so monument locations and resource node distributions shift.
Some wipes are map-only, meaning your learned blueprints (crafting recipes) carry over. Others are full wipes (also called BP wipes), which erase blueprints too and put every player back to true zero. According to RustyWipe’s breakdown of wipe types, knowing which kind of wipe a server runs tells you whether you will keep your crafting knowledge or need to re-research everything.
The wipe cycle length varies by server. Weekly servers reset every seven days. Biweekly servers reset every two weeks. Monthly servers run the full calendar month. For beginners, monthly wipe servers give you the most time to learn without the pressure of an imminent reset.
Why Force Wipe Matters For New Players
Facepunch enforces a mandatory force wipe on the first Thursday of every month. This affects every single Rust server regardless of its custom schedule. On force wipe day, every server gets a fresh map and a new Rust update.
Force wipe is the single best day to start playing Rust. The playing field is perfectly level. No one has a base, no one has guns, and experienced players are just as naked as you are. The wipe day guide from Falcon Rust emphasizes that early-wipe chaos is actually friendlier to beginners because groups are busy establishing their own bases instead of hunting fresh spawns.
If you can only play Rust one day per month, make it force wipe Thursday.
Best Time To Join A Fresh Map
Join within the first few hours of a wipe for the most even experience. The longer you wait after wipe day, the larger the gear gap becomes between you and established players.
If you missed wipe day, look for servers that wiped more recently. Many community servers stagger their wipe schedules throughout the week. Use the server browser’s “Last Wiped” column to find one that reset within the past 24 hours.
Playing during off-peak hours (late night or early morning in your server’s time zone) also helps. Fewer players roaming means fewer encounters while you are still in the primitive-tool stage. Once your base is up and your sleeping bag is placed, peak hours become less threatening.
Your First Hour Priorities
The first hour is where most new players either establish a foothold or rage-quit. Knowing exactly what to do in these opening minutes separates a frustrating wipe from a productive one. Focus on three things: resources, tools, and a safe respawn point.
Gather Wood, Stone, And Cloth Fast
The moment you spawn, start hitting trees with your rock. You need roughly 300 wood and 200 stone before you do anything else. Pick up any hemp plants (the green bushes) you see along the way because cloth is essential for your sleeping bag. You will also need cloth to craft bandages to stop bleeding and restore health during combat.
Do not stand still at one tree. Hit it a few times, move to the next, and keep your head on a swivel. Other players are doing the same thing, and some of them will kill you for your 50 wood without hesitation. Use your pickaxe to gather stone from small nodes and break barrels and crates along roads for components once you feel more confident, but in the first five minutes, just grab raw materials and move inland away from the beach.
Craft Your First Tools And Sleeping Bag
As soon as you have enough stone and wood, craft a stone hatchet and a stone pickaxe. These tools gather resources roughly three times faster than the rock. Your gathering speed is about to jump dramatically.
Next, craft a sleeping bag. This costs 30 cloth. Place it somewhere hidden (in bushes, behind a rock, or inside a small cave) so that if you die, you respawn near your progress instead of on a random beach. The sleeping bag is the single most important early-game item. Without it, every death resets your position on the map.
If you have extra cloth, craft a hunting bow and a few wooden arrows. You should also craft a campfire to keep you warm at night and cook raw meat you gather from a chicken or other wildlife. The bow is your first real weapon and lets you hunt animals for food or defend yourself against other primitive players.
Choose A Safe Area To Settle
Avoid building right next to large monuments like Launch Site, Power Plant, or Military Tunnels. These high-tier areas are constantly contested by geared teams. These attract experienced players running loot puzzles, and your twig shack will get demolished within minutes. As noted in a survival guide from Falcon Rust, the best early base locations are near smaller monuments like gas stations, supermarkets, or mining outposts. Safe zones like the Outpost or Bandit Camp offer recyclers and basic loot without constant PvP pressure. Just be careful if you see a chinook dropping a crate nearby, as it draws the most geared players on the map.
Look for an area with nearby trees, stone nodes, and a water source. Flat ground makes building easier. Finding a horse early on can help you scout the map and find these prime locations faster. Avoid the snow biome early on because cold damage drains your health without proper clothing, and the desert can dehydrate you quickly.
A good rule: if you can see a major monument from your front door, you are too close.
Build A Small Base That Buys You Time
Your first base does not need to be a fortress. It needs to be a locked box that protects your sleeping bag, a small stash of materials, and your workbench. The goal is buying yourself time to log off safely and pick up where you left off next session.
Place A Tool Cupboard Early
The tool cupboard (TC) is the most important item in base building. It claims building privilege in a radius around your base, preventing other players from building structures on top of or next to your walls. Without a TC, anyone can place walls, floors, or even a new door frame on your base and walk right in.
Craft a TC as soon as you have enough wood (1,000 wood total). Place it inside your base on the ground floor, ideally in a spot that is not the first room a raider enters. Authorize yourself on it, then stock it with enough resources to cover upkeep costs, which are a daily material drain that keeps your base from decaying.
A common beginner mistake is placing the TC outside or forgetting to lock the door to the TC room. Both give raiders free access to your building privilege.
Upgrade A Simple Starter Base
Start with a 1×2 or 2×1 layout. Use a building plan to place foundations, walls, and a doorframe. Then use your hammer to upgrade from twig to stone.
Twig walls are destroyed in seconds by any weapon. Wood walls can be burned down easily. Stone and sheet metal provide much better protection against flamethrowers and melee tools. Stone walls require explosives to breach, which most players will not have early in a wipe. Getting to stone walls is your first milestone, though upgrading your loot room to armored is the goal for endgame security.
Add an airlock: a second doorframe and door at your entrance so there is always a closed door between the outside and your main room. This two-door entry system prevents door campers from rushing in the moment you open your front door. It costs two extra doors but saves your base from the most common early-game attack.
Hide Loot And Reduce Early Losses
Do not keep all your resources in a single box. Spread loot across multiple small boxes or stashes. If someone does get in, they grab one box and leave, not your entire inventory.
Craft hidden stashes and bury them near your base with emergency supplies: a sleeping bag, 200 wood, 200 stone, some food, and basic tools. If your base gets raided, you can dig up your stash and rebuild in minutes instead of starting from the beach.
Keep your most valuable items on you when you log off only if you are sleeping inside a locked base. Otherwise, stash and hide. Paranoia is a survival skill in Rust.
Early Progression From Primitive To Armed
Once your starter base is standing and your sleeping bag is placed, your next goal is climbing the technology ladder. The jump from stone tools to real weapons changes the game from pure survival to strategic play.
Secure Food, Water, And Basic Resources
Hunt animals with your bow for cooked meat and animal fat. Deer and boar are the safest early targets; avoid bears and wolves until you have better gear. Cooked meat restores hunger and a small amount of health. Using a campfire inside your base also provides comfort, which speeds up your health regeneration while resting. Pumpkins and corn found near rivers and in small monuments are reliable food sources that require no cooking.
Fill water bottles or water catchers near rivers. Dehydration reduces your maximum health and eventually kills you. Place a small water catcher on your base roof for a passive supply.
Gather enough metal ore to smelt into metal fragments using a small furnace (crafted with 200 stone, 100 wood, and 50 low-grade fuel). Metal fragments let you craft code locks, which are far more secure than key locks since you cannot drop the code.
Move From Stone Tools To Bows And Guns
The hunting bow is your bridge weapon between the rock stage and real firearms. Practice headshots on animals; a bow headshot does significant damage and can drop a geared player if you land it cleanly. Craft bone arrows once you have bone fragments from animals, as they deal more damage than wooden arrows.
Your first firearm will likely come from a monument puzzle or a lucky barrel rather than crafting. The Revolver and Waterpipe Shotgun are the easiest guns to craft at a Level 1 Workbench. The Custom SMG, Thompson, and MP5 are solid choices for beginners. These firearms require specific components like springs and pipes, which you can find in military crates. A rare elite crate might even contain an AK-47 or an LR-300. Advanced weapons like the ak deal more damage but have difficult recoil patterns to learn.
Research any weapon you find at a Research Table. You can recycle components you do not need to get enough scrap for these blueprints. Learned blueprints survive map wipes on most servers, so one lucky find can set you up for multiple wipes.
Know When To Farm And When To Fight
Early in a wipe, most players are focused on gathering and building, making it the safest farming window. Farm aggressively in the first few hours while everyone is still primitive.
As the wipe matures and players gear up, farming becomes riskier. Switch to targeted runs: sprint to a specific monument, grab the loot, and sprint home. Avoid lingering in open fields with a full inventory.
Pick your fights carefully. Engaging another player means risking everything you are carrying. If you have a full inventory of stone and metal, run. If you are empty and spot a player who looks loaded, the risk-reward tips in your favor. Fighting with nothing to lose and everything to gain is one of the core Rust calculations you will make hundreds of times.
Avoid Easy Deaths And Cheap Raids
Surviving in Rust is not just about building walls. It is about not painting a target on yourself. Most early losses come from preventable mistakes rather than superior opponents.
Common Mistakes That Make You A Target
Building in twig and leaving it overnight is the number one beginner error. A player with a rock can break a twig wall in under a minute. Always upgrade to stone before logging off.
Leaving your base with furnaces running and smoke visible signals to every nearby player that someone is home and probably has resources. Time your smelting so it finishes before you go to sleep.
Running along roads with a full inventory is asking to get killed. Roads are high-traffic PvP zones. Cut through forests and use terrain to break line of sight. Common mistakes that kill beginners include hoarding loot you are afraid to use. A chest full of gear does nothing if you never wear it outside. Use your gear; you can always farm more.
How To Lower Your Offline Raid Risk
Offline raiding (attacking a base when the owner is logged off) is the most common raid type because it is the safest for the raider. You cannot prevent it entirely, but you can make your base less appealing.
Keep your base small. A 2×1 or 2×2 with stone or metal walls costs raiders explosives they would rather spend on a bigger target. Honeycomb (adding extra layers of walls around your core rooms) increases the number of walls a raider must blow through without increasing your upkeep dramatically.
Place your TC and loot in separate rooms. Using turrets to defend your main corridor will make an offline raid much more expensive for the attacker. Use small stashes buried outside as insurance. If your base does get hit, you still have a backup supply to rebuild.
Log off at unpredictable times. If raiders notice you log off at the same hour every night, they will time their raid accordingly.
When Raiding Makes Sense For Beginners
For most of your first wipe, raiding other players is not worth the investment. Satchel Charges (your earliest raiding tool) cost gunpowder, which takes sulfur ore, which takes time and a furnace. Two Satchel Charges to blow one wooden door might net you a few hundred wood and a sleeping bag. That is a terrible return on investment.
Raiding makes sense when you spot a clearly abandoned base (decaying walls, no recent activity) or when you can see loot through a gap in someone’s base design. As the raiding quick sheet on Steam outlines, stone walls require 2 C4 or 4 rockets, so budget your sulfur carefully and only raid targets where the likely loot exceeds your explosive cost.
Until you are comfortable with base building, PvP, and resource management, spend your sulfur on ammunition rather than raids.
Free Skins And Smart First-Day Goals
Rust’s skin system lets you customize weapons, armor, doors, and structures with cosmetic items that do not affect gameplay stats. You do not need to spend real money to start building a collection, and setting clear first-day goals keeps your session productive.
How Twitch And Kick Drops Work
Facepunch regularly partners with streamers on Twitch and Kick to offer free Rust skins through the Drops system. You link your Steam account to your Twitch or Kick account, watch a participating streamer for a set number of hours (usually 2 to 4), and claim the skin through the platform’s drop notification. The skin then appears in your Steam inventory automatically.
Drop events happen multiple times per year, often tied to major Rust updates or seasonal events. Check Corrosion Hour’s guide to free Rust skins for a current list of active and upcoming drop campaigns.
Keep in mind that drop skins are time-limited. If you miss the window, those specific skins may not return.
Where Rewardly Fits Into A Rust Player’s Routine
Between wipes or while waiting for a drop event, Rewardly offers another path to Rust skins without spending real money. You earn Coins by completing surveys, offerwall tasks, watching videos, or referring friends. Those Coins convert at a flat 1,000 Coins per $1 USD and can be redeemed for Rust skins listed at Steam Community Market value with no markup, or for Steam gift cards at face value.
There is no real-money deposit required. You earn through free actions, and the skins are delivered directly via Steam trade. The minimum redemption threshold is $5 (5,000 Coins), which is reachable through a few survey sessions. It fits naturally into downtime: complete a few offers while your base is quiet, and put those Coins toward a skin you actually want.
You can browse available Rust skins and start earning at the Rust rewards page on Rewardly.
First Day Checklist
Use this table as a quick reference to track your first-day progress:
| Priority | Task | Why It Matters |
| 1 | Gather 300 wood, 200 stone, 30 cloth | Enough for first tools and sleeping bag |
| 2 | Craft stone hatchet, stone pickaxe | 3x faster gathering than the rock |
| 3 | Place sleeping bag in a hidden spot | Respawn near your progress instead of a random beach |
| 4 | Craft hunting bow and arrows | First real weapon for hunting and self-defense |
| 5 | Find a base location away from large monuments | Reduces PvP encounters during building |
| 6 | Build a 1×2 or 2×1 base with airlock | Minimum viable shelter with door-camp protection |
| 7 | Place and authorize a tool cupboard | Prevents others from building on your base |
| 8 | Upgrade all walls to stone | Stone walls require explosives to breach |
| 9 | Craft a small furnace and smelt metal | Metal fragments for code lock (replaces key lock) |
| 10 | Place code lock on all doors | Eliminates risk of dropping a key on death |
| 11 | Bury a small stash near base with backup supplies | Insurance against raids |
| 12 | Cook food and fill a water container | Prevents hunger/thirst deaths overnight |
Complete this list and you are in better shape than the majority of players logging in for the first time.
Frequently Asked Questions
What are the best resources to start learning Rust from scratch in 2026?
If you mean the survival game, this guide covers your first-day essentials, and The Ultimate Rust Beginners Guide on YouTube walks through base building, monument runs, and gearing up in video form. For the Rust programming language, The Rust Programming Language book (often called “the Book”) is the official free resource, and W3Schools offers a structured Rust tutorial with interactive exercises.
How do I set up the Rust toolchain and create my first project on Windows, macOS, or Linux?
For the programming language, install rustup from the official Rust website, which manages the compiler and package manager (Cargo) across all three operating systems. Run cargo new my_project to generate a starter project with a main.rs file and a Cargo.toml configuration. The Rust 101 learning guide walks through this setup process step by step.
What core concepts should I learn first in Rust (ownership, borrowing, lifetimes)?
In the Rust programming language, ownership, borrowing, and lifetimes are the three pillars that make memory safety possible without a garbage collector. Start with ownership (each value has one owner), then borrowing (references that let you use data without taking ownership), and tackle lifetimes last once the first two concepts feel natural. The official Rust book covers these in chapters 4 and 10 with practical examples.
How do I fix common compiler errors and understand Rust’s error messages as a beginner?
Rust’s compiler is famously helpful. Read the full error message, including the suggestion lines that start with “help:” because they often contain the exact fix. Most early errors involve ownership violations, mismatched types, or missing trait implementations. Searching the error code (e.g., E0382) in the Rust error index gives you a detailed explanation with examples.
What’s the difference between Rust the programming language and Rust the survival game?
Rust the programming language is a systems programming language created by Mozilla Research, focused on performance and memory safety. Rust the survival game is a multiplayer survival title by Facepunch Studios where you gather resources, build bases, and compete against other players. They share a name but have zero connection. This article focuses entirely on the survival game.
How do I start the tutorial and complete Tutorial Island in the Rust game?
Rust does not have a traditional tutorial island as of 2026. When you first launch the game, you can explore a basic tutorial that covers movement, gathering, and crafting in a safe environment. The real learning happens on live servers, which is why choosing a beginner-friendly community server with low population and active moderation matters so much. Treat your first wipe as your tutorial and follow the first-day checklist in this guide to build a strong foundation.